WM Device Help : Seam Finder + Seam Remover
| Howard Zhou |
|
|
||
|
DownloadCurrent Version : WM2 (_2.dll 432
KB) (2008-09-21)
Example files (.zip 959 KB)
(.zip 1.5 MB) external DLLs required (Intel IPP 5.2), just drop it into the folder where the WM.exe resides or any system path.
|
||
Tool bar : The buttons don't look attractive at all. I will make better ones when I have more time.
|
||
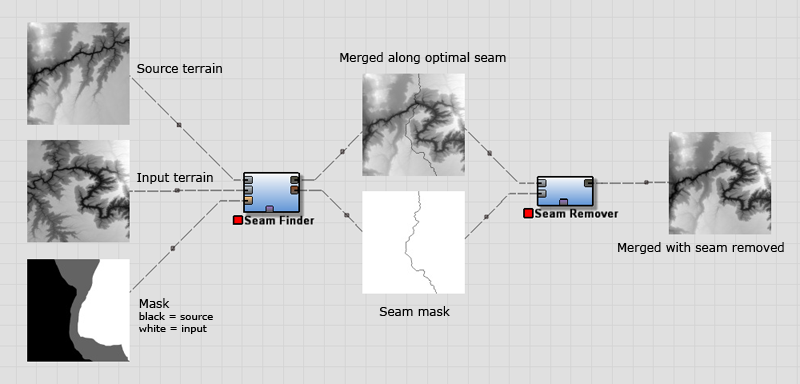
Flow chart :
|
||
Known Issues :
|
||
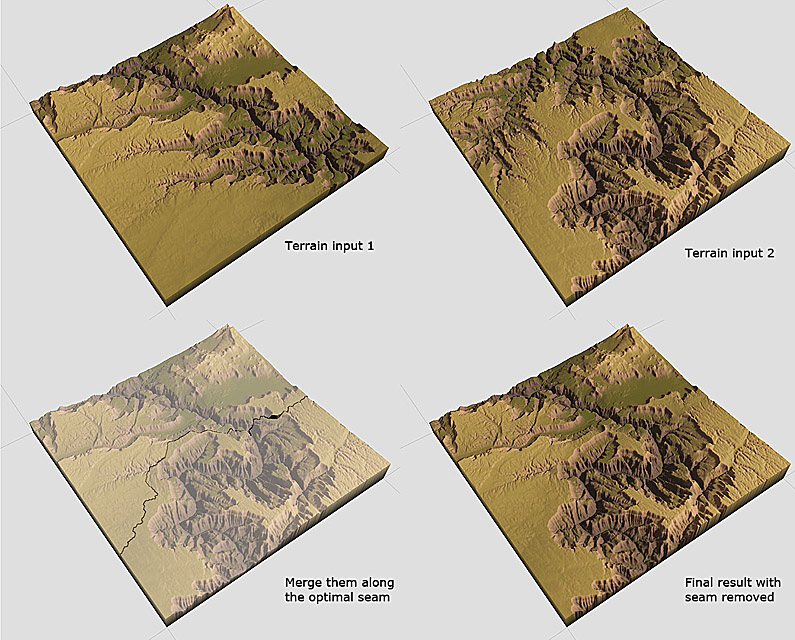
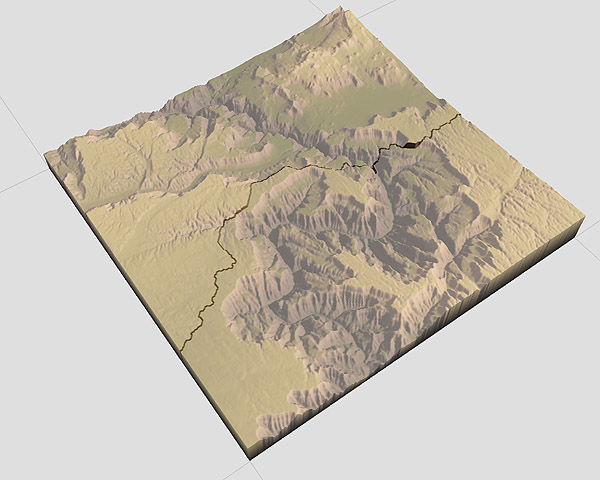
Example :
|
||
| Source terrain (Input 1) |
 |
|
| Input terrain (input 2) |
 |
|
 |
 |
|
|
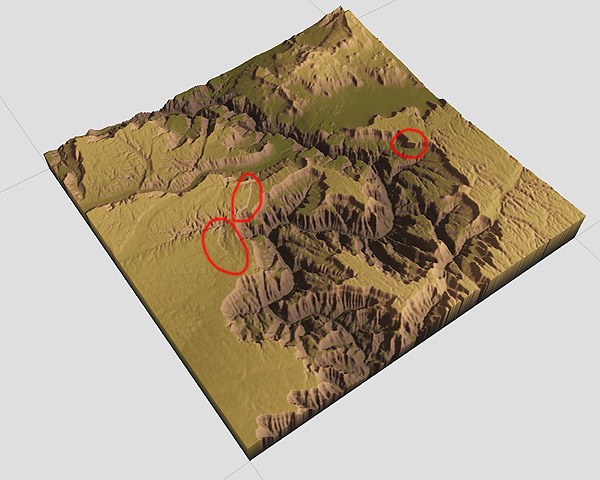
The mask for Seam Finder always consists of three different shades of gray. black pixels have to come from the source image and white pixels the input image. The gray pixels are left for the seam finder to decide. The output seam is the optimal seam with the height difference along the seam to be the least.
|
||
 |
||
|
However, there may still be significant height difference along the seam (red circles in the above image).
|
||
 |
||
|
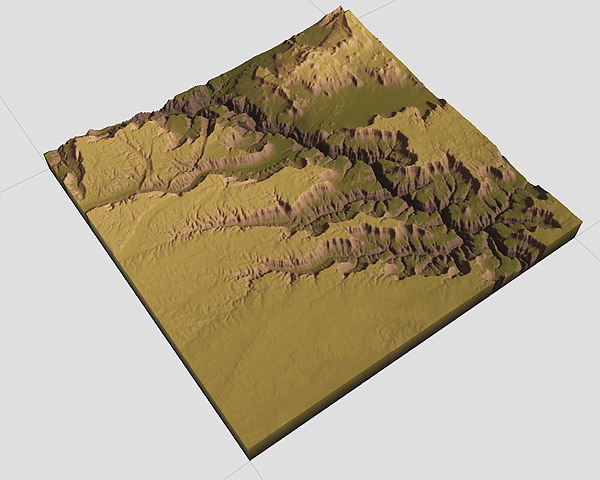
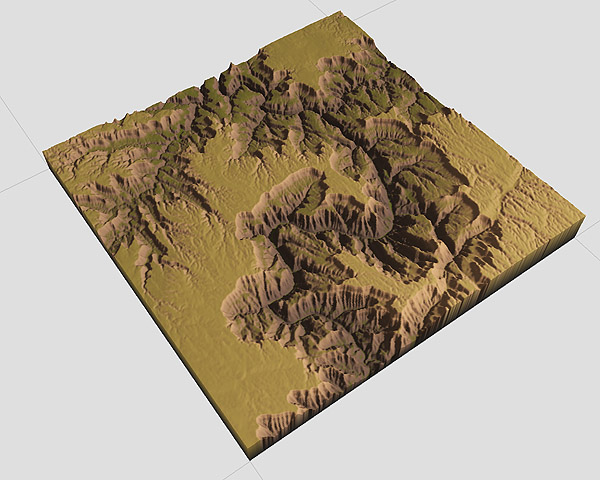
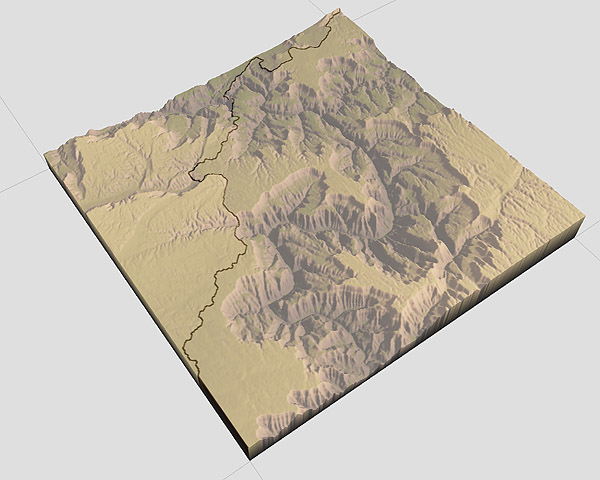
These visible seams can removed by Seam Remover. In the end, what you get are two heightfields seamlessly merged together.
|
||
|
Additional Examples :
|
||
 |
 |
|
|
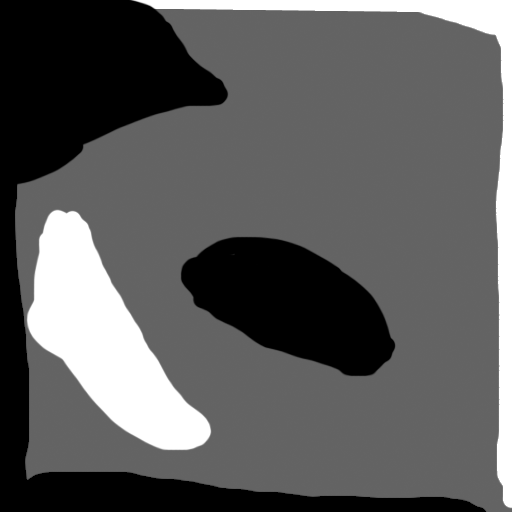
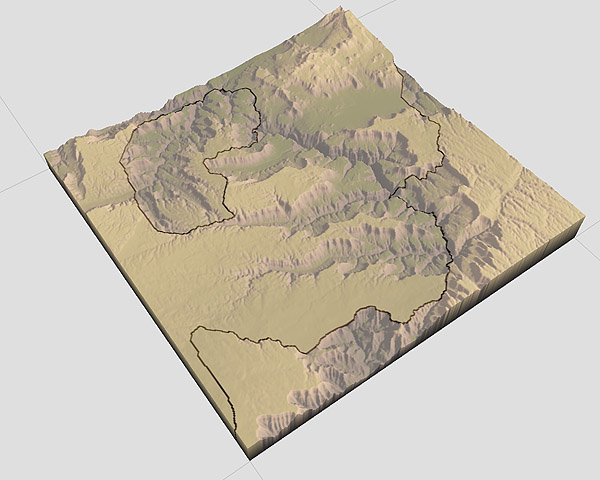
Although a good mask is the key to a good result, the mask is optional to Seam Finder. When a mask is not supplied, the seam finder generates a mask internally. It looks like the one shown above.
|
||
 |
 |
|
|
Neither the source nor the input areas need to be connected. You can be quite creative with the design of a mask. Just remember: black pixels are from the source and white pixels are from the input, and the Seam Finder gets to decide the rest.
|
||